So you want to easily test the code you’re writing? The following recipe covers how to write automated tests and see their code coverage. We also give pointers to plug those in modern continuous integration services like GitHub Actions, Gitlab CI, Travis CI or Coveralls.
We will be using a mature testing framework called FiveAM. It supports test suites, random testing, test fixtures (to a certain extent) and, of course, interactive development.
Previously on the Cookbook, the recipe was cooked with Prove. It used to be a widely liked testing framework but, because of some shortcomings, its repository was later archived. Its successor Rove is not stable enough and lacks some features, so we didn’t pick it. There are also some other testing frameworks to explore if you feel like it.
FiveAM has an API documentation. You may inspect it or simply read the docstrings in code. Most of the time, they would provide sufficient information that answers your questions… if you didn’t find them here. Let’s get started.
Testing with FiveAM
FiveAM has 3 levels of abstraction: check, test and suite. As you may have guessed:
- A check is a single assertion that checks that its argument is truthy. The most used check is
is. For example,(is (= 2 (+ 1 1))). - A test is the smallest runnable unit. A test case may contain multiple checks. Any check failure leads to the failure of the whole test.
- A suite is a collection of tests. When a suite is run, all tests inside would be performed. A suite allows paternity, which means that running a suite will run all the tests defined in it and in its children suites.
A simple code sample containing the 3 basic blocks mentioned above can be shown as follows:
(def-suite* my-suite)

(test my-test
  (is (= 2 (+ 1 1))))
It is totally up to the user to decide the hierarchy of tests and suites. Here we mainly focus on the usage of FiveAM.
Suppose we have built a rather complex system and the following functions are part of it:
;; We have a custom "file doesn't exist" condition.
(define-condition file-not-existing-error (error)
  ((filename :type string :initarg :filename :reader filename)))

;; We have a function that tries to read a file and signals the above condition
;; if the file doesn't exist.
(defun read-file-as-string (filename &key (error-if-not-exists t))
  "Read file content as string. FILENAME specifies the path of file.

Keyword ERROR-IF-NOT-EXISTS specifies the operation to perform when the file
is not found. T (by default) means an error will be signaled. When given NIL,
the function will return NIL in that case."
  (cond
    ((uiop:file-exists-p filename)
     (uiop:read-file-string filename))
    (error-if-not-exists
     (error 'file-not-existing-error :filename filename))
    (t nil)))
We will write tests for that code. In particular, we must ensure:
- that the content read in a file is the expected content,
- that the condition is signaled if the file doesn’t exist.
Install and load
FiveAM is in Quicklisp and can be loaded with the following command:
(ql:quickload "fiveam")
The package is named fiveam with a nickname 5am. For the sake of simplicity, we will ignore the package prefix in the following code samples.
It is like we :used fiveam in our test package definition. You
can also follow along in the REPL with (use-package :fiveam).
Here is a package definition you can use:
(in-package :cl-user)
(defpackage my-fiveam-test
  (:use :cl
        :fiveam))
(in-package :my-fiveam-test)
Defining suites (def-suite, def-suite*)
Testing in FiveAM usually starts by defining a suite. A suite helps separating tests to smaller collections that makes them more organized. It is highly recommended to define a single root suite for the sake of ASDF integration. We will talk about it later, now let’s focus on the testing itself.
The code below defines a suite named my-system. We will use it as the root suite for the whole system.
(def-suite my-system
  :description "Test my system")
Then let’s define another suite for testing the read-file-as-string function.
;; Define a suite and set it as the default for the following tests.
(def-suite read-file-as-string
  :description "Test the read-file-as-string function."
  :in my-system)
(in-suite read-file-as-string)

;; Alternatively, the following line is a combination of the 2 lines above.
(def-suite* read-file-as-string :in my-system)
Here a new suite named read-file-as-string has been defined. It is declared to be a child suite of my-system as specified by the :in keyword. The macro in-suite sets it as the default suite for the tests defined later.
Defining tests
Before diving into tests, here is a brief introduction of the available checks you may use inside tests:
- The
ismacro is likely the most used check. It simply checks if the given expression returns a true value and generates atest-passedortest-failureresult accordingly. - The
skipmacro takes a reason and generates atest-skippedresult. - The
signalsmacro checks if the given condition was signaled during execution.
There is also:
finishes: passes if the assertion body executes to normal completion. In other words, if the body signals an error or makes a non-local jump, then this test fails.pass: marks the test as passed.is-true: likeis, but unlike it this check does not inspect the assertion body to determine how to report the failure. Similarly, there isis-false.
Please note that all the checks accept an optional reason, as string, that can be formatted with format directives (see more below). When omitted, FiveAM generates a report that explains the failure according to the arguments passed to the function.
The test macro provides a simple way to define a test with a name.
Note that below, we expect two files to exist: /tmp/hello.txt should contain “hello” and /tmp/empty.txt should be empty.
;; Our first "base" case: we read a file that contains "hello".
(test read-file-as-string-normal-file
  (let ((result (read-file-as-string "/tmp/hello.txt")))
    ;; Tip: put the expected value as the first argument of = or equal, string= etc.
    ;; FiveAM generates a more readable report following this convention.
    (is (string= "hello" result))))

;; We read an empty file.
(test read-file-as-string-empty-file
  (let ((result (read-file-as-string "/tmp/empty.txt")))
    (is (not (null result)))
    ;; The reason can be used to provide formatted text.
    (is (= 0 (length result)))
        "Empty string expected but got ~a" result))

;; Now we test that reading a non-existing file signals our condition.
(test read-file-as-string-non-existing-file
  (let ((result (read-file-as-string "/tmp/non-existing-file.txt"
                                     :error-if-not-exists nil)))
    (is (null result)
      "Reading a file should return NIL when :ERROR-IF-NOT-EXISTS is set to NIL"))
  ;; SIGNALS accepts the unquoted name of a condition and a body to evaluate.
  ;; Here it checks if FILE-NOT-EXISTING-ERROR is signaled.
  (signals file-not-existing-error
    (read-file-as-string "/tmp/non-existing-file.txt"
                         :error-if-not-exists t)))
In the above code, three tests were defined with 5 checks in total. Some checks were actually redundant for the sake of demonstration. You may put all the checks in one big test, or in multiple scenarios. It is up to you.
The macro test is a convenience for def-test to define simple tests. You may read its docstring for a more complete introduction, for example to read about :depends-on.
Running tests
FiveAm provides multiple ways to run tests. The macro run! is a good start point during development. It accepts a name of suite or test and run it, then prints testing report in standard output. Let’s run the tests now!
(run! 'my-system)
; Running test suite MY-SYSTEM
;  Running test READ-FILE-AS-STRING-EMPTY-FILE ..
;  Running test READ-FILE-AS-STRING-NON-EXISTING-FILE ..
;  Running test READ-FILE-AS-STRING-NORMAL-FILE .
;  Did 5 checks.
;     Pass: 5 (100%)
;     Skip: 0 ( 0%)
;     Fail: 0 ( 0%)
;  => T, NIL, NIL
If we mess read-file-as-string-non-existing-file up by replacing /tmp/non-existing-file.txt with /tmp/hello.txt, the test would fail (sure!) as expected:
(run! 'read-file-as-string-non-existing-file)
; Running test READ-FILE-AS-STRING-NON-EXISTING-FILE ff
;  Did 2 checks.
;     Pass: 0 ( 0%)
;     Skip: 0 ( 0%)
;     Fail: 2 (100%)
;  Failure Details:
;  --------------------------------
;  READ-FILE-AS-STRING-NON-EXISTING-FILE []:
;       Should return NIL when :ERROR-IF-NOT-EXISTS is set to NIL.
;  --------------------------------
;  --------------------------------
;  READ-FILE-AS-STRING-NON-EXISTING-FILE []:
;       Failed to signal a FILE-NOT-EXISTING-ERROR.
;  --------------------------------
;  => NIL
; (#<IT.BESE.FIVEAM::TEST-FAILURE {10064485F3}>
;  #<IT.BESE.FIVEAM::TEST-FAILURE {1006438663}>)
; NIL
The behavior of the suite/test runner can be customized by the *on-failure* variable, which controls what to do when a check failure happens. It can be set to one of the following values:
:debugto drop to the debugger.:backtraceto print a backtrace and continue.NIL(default) to simply continue and print the report.
There is also *on-error*.
Running tests as they are compiled
Under normal circumstances, a test is written and compiled (with the
usual C-c C-c in Slime) separately from the moment it is run. If you
want to run the test when it is defined (with C-c C-c), set this:
(setf fiveam:*run-test-when-defined* t)
Custom and shorter tests explanations
We said earlier that a check accepts an optional custom reason that can be formatted with format directives. Here’s a simple example.
We are testing a math function:
(fiveam:test simple-maths
  (is (= 3 (+ 1 1))))
When we run! it, we see this somewhat lengthy but informative output (and that’s very important):
Running test suite NIL
 Running test SIMPLE-MATHS f
 Did 1 check.
    Pass: 0 ( 0%)
    Skip: 0 ( 0%)
    Fail: 1 (100%)

 Failure Details:
 --------------------------------
 SIMPLE-MATHS []:

(+ 1 1)

 evaluated to

2

 which is not

=

 to

3


 --------------------------------
Now, we can give it a custom reason:
(fiveam:test simple-maths
  (is (= 3 (+ 1 1))
      "Maths should work, right? ~a. Another parameter is: ~S" t :foo))
And we will see:
Running test suite NIL
 Running test SIMPLE-MATHS f
 Did 1 check.
    Pass: 0 ( 0%)
    Skip: 0 ( 0%)
    Fail: 1 (100%)

 Failure Details:
 --------------------------------
 SIMPLE-MATHS []:
      Maths should work, right? T. Another parameter is: :FOO
 --------------------------------
Fixtures
FiveAM also provides a feature called fixtures for setting up testing context. The goal is to ensure that some functions are not called and always return the same result. Think functions hitting the network: you want to isolate the network call in a small function and write a fixture so that in your tests, this function always returns the same, known result. (But if you do so, you might also need an “end to end” test that tests with real data and all your code…)
However, FiveAM’s fixture system is nothing more than a macro, it is not fully-featured compared to other libraries such as Mockingbird, and even FiveAM’s maintainer encourages to “just use a macro” instead.
Mockingbird (and maybe other libraries), in addition to the basic feature descibed above, also allows to count the number of times a function was called, with what arguments, and so on.
Random checking
The goal of random testing is to assist the developer in generating test cases, and thus, to find cases that the developer would not have thought about.
We have a few data generators at our disposal, for example:
(gen-float)
#<CLOSURE (LAMBDA () :IN GEN-FLOAT) {1005A906AB}>

(funcall (gen-float))
9.220082e37

(funcall (gen-integer :max 27 :min -16))
26
or again, gen-string, gen-list, gen-tree, gen-buffer, gen-character.
And we have a function to run 100 checks, taking each turn a new value from the given generators: for-all:
(test randomtest
  (for-all ((a (gen-integer :min 1 :max 10))
            (b (gen-integer :min 1 :max 10)))
    "Test random tests."
    (is (<= a b))))
When you run! 'randomtest this, I expect you will hit an error. You can’t
possibly always get a lower than b, can you?
For more, see FiveAM’s documentation.
See also cl-quickcheck and Check-it, inspired by Haskell’s QuickCheck test framework.
ASDF integration
So it would be nice to provide a one-line trigger to test our my-system system. Recall that we said it is better to provide a root suite? Here is the reason:
(asdf:defsystem my-system
  ;; Parts omitted.
  :in-order-to ((test-op (test-op :my-system/test))))

(asdf:defsystem mitogrator/test
  ;; Parts omitted.
  :perform (test-op (op c)
                    (symbol-call :fiveam :run!
                                 (find-symbol* :my-system :my-system/test))))
The last line tells ASDF to load symbol :my-system from my-system/test package and call fiveam:run!. It fact, it is equivalent to (run! 'my-system) as mentioned above.
Running tests on the terminal
Until now, we ran our tests from our editor’s REPL. How can we run them from a terminal window?
As always, the required steps are as follow:
- start our Lisp
- make sure Quicklisp is enabled (if we have external dependencies)
- load our main system
- load the test system
- run the FiveAM tests.
You could put them in a new run-tests.lisp file:
(load "mysystem.lisp")
(load "mysystem-tests.lisp") ;; <-- where all the FiveAM tests are written.
(in-package :mysystem-tests)

(run!)  ;; <-- run all the tests and print the report.
and you could invoke it like so, from a source file or from a Makefile:
rlwrap sbcl --non-interactive --load mysystem.asd --eval '(ql:quickload :mysystem)' --load run-tests.lisp
;; we assume Quicklisp is installed and loaded. This can be done in the Lisp startup file like .sbclrc.
Before going that route however, have a look at the CI-Utils tool
that we use in the Continuous Integration section below. It provides a
run-fiveam command that can do all that for you.
But let us highlight something you’ll have to take care of if you ran
your tests like this: the exit code. Indeed, (run!) prints a
report, but it doesn’t say to your Lisp wether the tests were
successful or not, and wether to exit with an exit code of 0 (for
success) or more (for errors). So, if your testst were run on a CI
system, the CI status would be always green, even if tests failed. To
remedy that, replace run! by:
(let ((result (run!)))
  (cond
    ((null result)
     (log:info "Tests failed!")  ;; FiveAM printed the report already.
     (uiop:quit 1))
    (t
     (log:info "All pass.")
     (uiop:quit))))
Check with echo $? on your shell that the exit code is correct.
Testing report customization
It is possible to generate our own testing report. The macro run! is nothing more than a composition of explain! and run.
Instead of generating a testing report like its cousin run!, the function run runs suite or test passed in and returns a list of test-result instance, usually instances of test-failure or test-passed sub-classes.
A class text-explainer is defined as a basic class for testing report generator. A generic function explain is defined to take a text-plainer instance and a test-result instance (returned by run) and generate testing report. The following 2 code snippets are equivalent:
(run! 'read-file-as-string-non-existing-file)

(explain (make-instance '5am::detailed-text-explainer)
         (run 'read-file-as-string-non-existing-file))
By creating a new sub-class of text-explainer and a method explain for it, it is possible to define a new test reporting system.
The following code just provides a proof-of-concept implementation. You may need to read the source code of 5am::detailed-text-explainer to fully understand it.
(defclass my-explainer (5am::text-explainer)
  ())

(defmethod 5am:explain ((explainer my-explainer) results &optional (stream *standard-output*) recursive-deps)
  (loop for result in results
        do (case (type-of result)
             ('5am::test-passed
              (format stream "~%Test ~a passed" (5am::name (5am::test-case result))))
             ('5am::test-failure
              (format stream "~%Test ~a failed" (5am::name (5am::test-case result)))))))

(explain (make-instace 'my-explainer)
         (run 'read-file-as-string-non-existing-file))
; Test READ-FILE-AS-STRING-NON-EXISTING-FILE failed
; Test READ-FILE-AS-STRING-NON-EXISTING-FILE passed => NIL
Interactively fixing unit tests
Common Lisp is interactive by nature (or so are most implementations), and testing frameworks make use of it. It is possible to ask the framework to open the debugger on a failing test, so that we can inspect the stack trace and go to the erroneous line instantly, fix it and re-run the test from where it left off, by choosing the suggested restart.
With FiveAM, set fiveam:*on-failure* to :debug:
(setf fiveam:*on-failure* :debug)
You will be dropped into the interactive debugger if an error occurs.
Use :backtrace to print a backtrace, continue to run the following tests and print FiveAM’s report.
The default is nil: carry on the tests execution and print the report.
Below is a short screencast showing all this in action:
Note that in the debugger:
<enter>on a backtrace shows more of itvon a backtrace goes to the corresponding line or function.- you can discover more options with the menu.
Code coverage
A code coverage tool produces a visual output that allows to see what parts of our code were tested or not:

Such capabilities are included into Lisp implementations. For example, SBCL has the sb-cover module and the feature is also built-in in CCL or LispWorks.
Generating an html test coverage output
Let’s do it with SBCL’s sb-cover.
Coverage reports are only generated for code compiled using
compile-file with the value of the sb-cover:store-coverage-data
optimization quality set to 3.
;;; Load SB-COVER
(require :sb-cover)

;;; Turn on generation of code coverage instrumentation
;;; in the compiler
(declaim (optimize sb-cover:store-coverage-data))

;;; Load some code, ensuring that it's recompiled
;;; with the new optimization policy.
(asdf:oos 'asdf:load-op :cl-ppcre-test :force t)

;;; Run the test suite.
(fiveam:run! yoursystem-test)
Produce a coverage report, set the output directory:
(sb-cover:report "coverage/")
Finally, turn off instrumentation:
(declaim (optimize (sb-cover:store-coverage-data 0)))
You can open your browser at
../yourproject/t/coverage/cover-index.html to see the report like
the capture above or like
this code coverage of cl-ppcre.
Continuous Integration
Continuous Integration is important to run automatic tests after a commit or before a pull request, to run code quality checks, to build and distribute your software… well, to automate everything about software.
We want our programs to be portable across Lisp implementations, so we’ll set up our CI pipeline to run our tests against several of them (it could be SBCL and CCL of course, but while we’re at it ABCL, ECL and possibly more).
We have a choice of Continuous Integration services: Travis CI, Circle, Gitlab CI, now also GitHub Actions, etc (many existed before GitHub Actions, if you wonder). We’ll have a look at how to configure a CI pipeline for Common Lisp, and we’ll focus a little more on Gitlab CI on the last part.
We’ll also quickly show how to publish coverage reports to the Coveralls service. cl-coveralls helps to post our coverage to the service.
GitHub Actions, Circle CI, Travis… with CI-Utils
We’ll use CI-Utils, a set of utilities that comes with many examples. It also explains more precisely what is a CI system and compares a dozen of services.
It relies on Roswell to install the Lisp implementations and to run the tests. They all are installed with a bash one-liner:
curl -L https://raw.githubusercontent.com/roswell/roswell/release/scripts/install-for-ci.sh | bash
(note that on the Gitlab CI example, we use a ready-to-use Docker image that contains them all)
It also ships with a test runner for FiveAM, which eases some rough parts (like returning the right error code to the terminal). We install ci-utils with Roswell, and we get the run-fiveam executable.
Then we can run our tests:
run-fiveam -e t -l foo/test :foo-tests # foo is our project
Following is the complete .travis.yml file.
The first part should be self-explanatory:
### Example configuration for Travis CI ###
language: generic

addons:
  homebrew:
    update: true
    packages:
    - roswell
  apt:
    packages:
      - libc6-i386 # needed for a couple implementations
      - default-jre # needed for abcl

# Runs each lisp implementation on each of the listed OS
os:
  - linux
#  - osx # OSX has a long setup on travis, so it's likely easier
#          to just run select implementations on OSX.
This is how we configure the implementations matrix, to run our tests on several Lisp implementations. We also send the test coverage made with SBCL to Coveralls.
env:
  global:
    - PATH=~/.roswell/bin:$PATH
    - ROSWELL_INSTALL_DIR=$HOME/.roswell
#    - COVERAGE_EXCLUDE=t  # for rove
  jobs:
    # The implementation and whether coverage
    # is sent to coveralls are controlled
    # with these environmental variables
    - LISP=sbcl-bin COVERALLS=true
    - LISP=ccl-bin
    - LISP=abcl
    - LISP=ecl   # warn: in our experience,
    # compilations times can be long on ECL.

# Additional OS/Lisp combinations can be added
# to those generated above
jobs:
  include:
    - os: osx
      env: LISP=sbcl-bin
    - os: osx
      env: LISP=ccl-bin
Some jobs can be marked as allowed to fail:
# Note that this should only be used if there is no interest
# for the library to work on that system
#  allow_failures:
#    - env: LISP=abcl
#    - env: LISP=ecl
#    - env: LISP=cmucl
#    - env: LISP=alisp
#      os: osx

  fast_finish: true
We finally install Roswell, the implementations, and we run our tests.
cache:
  directories:
    - $HOME/.roswell
    - $HOME/.config/common-lisp

install:
  - curl -L https://raw.githubusercontent.com/roswell/roswell/release/scripts/install-for-ci.sh | sh
  - ros install ci-utils #for run-fiveam
#  - ros install rove #for [run-] rove

  # If asdf 3.16 or higher is needed, uncomment the following lines
  #- mkdir -p ~/common-lisp
  #- if [ "$LISP" == "ccl-bin" ]; then git clone https://gitlab.common-lisp.net/asdf/asdf.git ~/common-lisp; fi

script:
  - run-fiveam -e t -l foo/test :foo-tests
  #- rove foo.asd
Below with Gitlab CI, we’ll use a Docker image that already contains the Lisp binaries and every Debian package required to build Quicklisp libraries.
Gitlab CI
Gitlab CI is part of
Gitlab and is available on Gitlab.com, for
public and private repositories. Let’s see straight away a simple
.gitlab-ci.yml:
variables:
  QUICKLISP_ADD_TO_INIT_FILE: "true"

image: clfoundation/sbcl:latest

before_script:
  - install-quicklisp
  - git clone https://github.com/foo/bar ~/quicklisp/local-projects/

test:
  script:
    - make test
Gitlab CI is based on Docker. With image we tell it to use the latest tag
of the clfoundation/sbcl
image. This includes the latest version of SBCL, many OS packages useful for CI
purposes, and a script to install Quicklisp. Gitlab will load the image, clone
our project and put us at the project root with administrative rights to run
the rest of the commands.
test is a “job” we define, script is a
recognized keywords that takes a list of commands to run.
Suppose we must install dependencies before running our tests: before_script
will run before each job. Here we install Quicklisp (adding it to SBCL’s init
file), and clone a library where Quicklisp can find it.
We can try locally ourselves. If we already installed Docker and
started its daemon (sudo service docker start), we can do:
docker run --rm -it -v /path/to/local/code:/usr/local/share/common-lisp/source clfoundation/sbcl:latest bash
This will download the lisp image (±300MB compressed), mount some local code in
the image where indicated, and drop us in bash. Now we can try a make test.
Here is a more complete example that tests against several CL implementations in parallel:
variables:
  IMAGE_TAG: latest
  QUICKLISP_ADD_TO_INIT_FILE: "true"
  QUICKLISP_DIST_VERSION: latest

image: clfoundation/$LISP:$IMAGE_TAG

stages:
  - test
  - build

before_script:
  - install-quicklisp
  - git clone https://github.com/foo/bar ~/quicklisp/local-projects/

.test:
  stage: test
  script:
    - make test

abcl test:
  extends: .test
  variables:
    LISP: abcl

ccl test:
  extends: .test
  variables:
    LISP: ccl

ecl test:
  extends: .test
  variables:
    LISP: ecl

sbcl test:
  extends: .test
  variables:
    LISP: sbcl

build:
  stage: build
  variables:
    LISP: sbcl
  only:
    - tags
  script:
    - make build
  artifacts:
    paths:
      - some-file-name
Here we defined two stages (see
environments),
“test” and “build”, defined to run one after another. A “build” stage
will start only if the “test” one succeeds.
“build” is asked to run only when a
new tag is pushed, not at every commit. When it succeeds, it will make
the files listed in artifacts’s paths available for download. We can
download them from Gitlab’s Pipelines UI, or with an url. This one will download
the file “some-file-name” from the latest “build” job:
https://gitlab.com/username/project-name/-/jobs/artifacts/master/raw/some-file-name?job=build
When the pipelines pass, you will see:
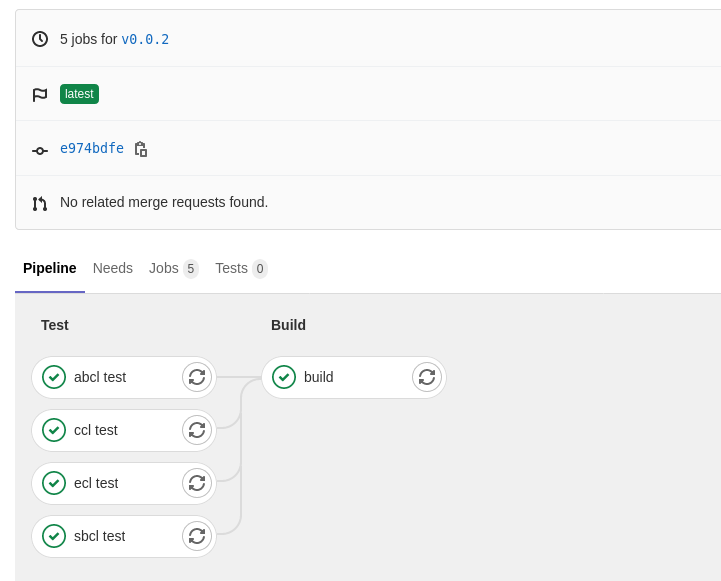
You now have a ready to use Gitlab CI.
SourceHut
It’s very easy to set up SourceHut’s CI system for Common
Lisp. Here is a minimal .build.yml file that you can test via the build
manifest tester:
image: archlinux
packages:
- sbcl
- quicklisp
sources:
- https://git.sr.ht/~fosskers/cl-transducers
tasks:
# If our project isn't in the special `common-lisp` directory, quicklisp won't
# be able to find it for loading.
- move: |
    mkdir common-lisp
    mv cl-transducers ~/common-lisp
- quicklisp: |
    sbcl --non-interactive --load /usr/share/quicklisp/quicklisp.lisp --eval "(quicklisp-quickstart:install)"
- test: |
    cd common-lisp/cl-transducers
    sbcl --non-interactive --load ~/quicklisp/setup.lisp --load run-tests.lisp
Since the Docker image we’re given is nearly empty, we need to install sbcl
and quicklisp manually. Notice also that we’re running a run-tests.lisp file
to drive the tests. Here’s what it could look like:
(ql:quickload :transducers/tests)
(in-package :transducers/tests)

(let ((status (parachute:status (parachute:test 'transducers/tests))))
  (cond ((eq :PASSED status) (uiop:quit))
        (t (uiop:quit 1))))
Here, examples of the Parachute testing
library are shown. As shown elsewhere, in order for the CI job to fail when any
test fails, we manually check the test result status and return 1 when there’s
a problem.
Emacs integration: running tests using Slite
Slite stands for SLIme TEst runner. It allows you to see the summary of test failures, jump to test definitions, rerun tests with the debugger… all from inside Emacs. We get a dashboard-like buffer with green and red badges, from where we can act on tests. It makes the testing process even more integrated and interactive.
It consists of an ASDF system and an Emacs package. It is a new project (it appeared mid 2021) so, as of September 2021, neither can be installed via Quicklisp or MELPA yet. Please refer to its repository for instructions.
References
- Tutorial: Working with FiveAM, by Tomek “uint” Kurcz
- Comparison of Common Lisp Testing Frameworks, by Sabra Crolleton.
- the CL Foundation Docker images
See also
- cl-cookieproject, a project skeleton with a FiveAM tests structure.
Page source: testing.md